Blog

  • crispy chicken caesar salad

    How to Make a Healthy Caesar Salad with Grilled Chicken

    If you’re looking for a healthier recipe, you’re in the right place! Today, I’m going to show you how to make a classic Caesar salad with perfectly grilled chicken, all from scratch. This recipe is delicious, simple, and packed with flavor. Let’s dive in!

    What You’ll Need:

    • Anchovies (or anchovy paste)
    • Mayonnaise – 1 cup
    • Lemon Juice – 5 tablespoons (from 1 large lemon)
    • Dijon Mustard – 1 tablespoon
    • Garlic Paste – 1 teaspoon
    • Worcestershire Sauce – a few dashes
    • Salt and Pepper – to taste
    • Parmesan Cheese – ½ cup, freshly grated
    • Olive Oil – 1 to 2 tablespoons (for thinning the dressing if needed)
    • French Bread – for homemade croutons
    • Chicken Breasts – for grilling
    • Butter – for basting the chicken
    • Avocado Oil – for cooking the chicken

    Step 1: Make the Caesar Dressing

    Start by preparing the Caesar dressing. You can use anchovy paste from the store, but if you want to go the extra mile, chop some anchovies into small pieces and mash them into a paste. Mix these with mayonnaise, lemon juice, Dijon mustard, garlic paste, Worcestershire sauce, and freshly grated Parmesan cheese. Whisk everything together until it’s smooth.

    If the dressing is too thick, you can add olive oil or more lemon juice to reach your desired consistency. Taste it and adjust the flavors as needed.

    Step 2: Make Homemade Croutons

    For the croutons, take some French bread and cut it into small pieces. Drizzle olive oil over them, add your favorite seasoning, and place them on a baking sheet. Bake in a 400°F (200°C) oven until they’re crispy and golden.

    Step 3: Cook the Chicken

    To cook the chicken, season both sides with your favorite chicken seasoning. Heat some avocado oil in a hot skillet and place the chicken breasts in the skillet. Press them down with your hand to ensure they get a nice sear. Cook each side for about 2 to 3 minutes, then baste the chicken with butter and finish cooking it in a 400°F (200°C) oven until the internal temperature reaches 165°F (74°C).

    Step 4: Prepare the Salad

    While the chicken is cooking, wash and dry some Romaine lettuce. Chop it into rough pieces and place it in a mixing bowl. Add your homemade Caesar dressing and toss it to coat the lettuce evenly.

    For extra flavor, you can add freshly grated Parmesan cheese and some larger shaved pieces for a nice presentation.

    Step 5: Assemble the Salad

    Once the chicken is done, let it rest for a few minutes. Slice it into thin pieces at an angle to make it look nice on the plate. Plate the salad with the chicken on the side or on top, as you prefer. Add some croutons and a little more shaved Parmesan for decoration.

    Finish off with a squeeze of fresh lemon juice for that final burst of flavor. Don’t forget to add a little fresh cracked black pepper for extra taste.

    Step 6: Serve and Enjoy!

    Your homemade Caesar salad with grilled chicken is ready to serve! It’s light, full of flavor, and a healthier version of the classic. Enjoy!


    This recipe is easy to make, and you can adjust the ingredients to suit your taste. It’s a great meal for lunch or dinner. Enjoy your tasty, homemade Caesar salad!English (auto-generated)
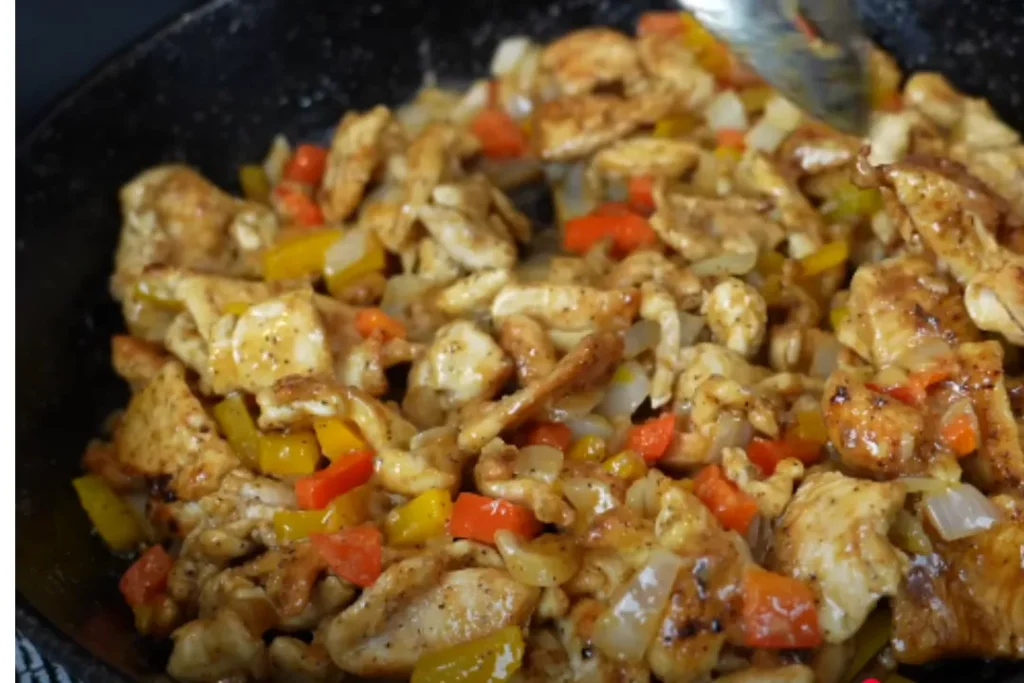
  • chicken philly cheesesteak recipe

    This recipe for a Chicken Philly Cheese Steak is a perfect twist on the classic, and it’s easy to follow! If you’re ready to ditch the usual meal prep and use up that chicken breast, you’re in for a treat.

    Ingredients:

    • Chicken Breast (boneless, skinless, thinly sliced; you can also use chicken thighs)
    • White Hoagie Rolls (or whatever bread you prefer, like wheat or low-carb wraps)
    • Mayo (or sauce of your choice)
    • Garlic (minced)
    • Onions (sliced)
    • Bell Peppers (sliced; any color)
    • Provolone Cheese (or any melty cheese you like)
    • Butter (for toasting and cooking)
    • Avocado Oil (optional, for cooking)
    • Worcestershire Sauce (adds extra flavor)
    • Seasoning (use your favorite, but recommended: all-purpose seasoning, garlic powder, onion powder, cayenne for heat)

    Instructions:

    1. Prep the Vegetables:

    • Slice the bell peppers and onions evenly. This helps them cook at the same rate.
    • Feel free to adjust the veggies to your liking — add mushrooms or leave out the peppers if you prefer.

    2. Prepare the Chicken:

    • Tip: Freeze the chicken for about 30 minutes to make slicing easier.
    • Slice the chicken breast into thin, bite-sized pieces. Use a sharp knife to make this step smooth.
    • Season the chicken with your choice of seasonings (all-purpose seasoning, garlic powder, onion powder, a little cayenne for spice).

    3. Toast the Bread:

    • Slice your hoagie rolls open (don’t cut all the way through) to create a pocket.
    • Melt butter in a skillet and toast the rolls until golden brown. Press them down a bit for an even toast.
    • Set the rolls aside after they’re nicely toasted.

    4. Cook the Veggies:

    • In the same skillet, add more butter and a bit of avocado oil if you like.
    • Toss in your bell peppers, onions, and garlic. Season with salt, pepper, and a bit of all-purpose seasoning.
    • Cook for about 4-5 minutes until they soften. If you want it spicier, feel free to add jalapenos or red pepper flakes.

    5. Cook the Chicken:

    • Increase the heat to medium-high and cook the chicken in batches (to avoid steaming it).
    • Get the chicken nice and golden brown for flavor and texture.
    • Once both batches are cooked, add them all back into the skillet with the veggies.
    • Stir in Worcestershire sauce and cook off any liquid, leaving a flavorful mix.

    6. Add Cheese:

    • Once everything is combined, sprinkle a generous amount of provolone cheese over the chicken and veggies.
    • Let it melt until gooey and bubbly.

    7. Assemble the Sandwich:

    • Spread Duke’s mayonnaise (or your favorite sauce) on the inside of the toasted rolls.
    • Pile the cheesy, chicken-veggie mixture into the rolls.

    8. Final Touch:

    • For a pop of freshness and color, sprinkle some chopped parsley over the top.
    • Enjoy your delicious Chicken Philly Cheese Steak!

    Tips:

    • Customizable: Adjust the veggies (mushrooms, spinach, or jalapenos) and cheese based on your preferences.
    • To make it even healthier: Serve it on a low-carb wrap or opt for a whole-wheat roll.

    This dish is great for a quick dinner, and the taste test will definitely be worth it. The perfect combination of savory chicken, melted cheese, and flavorful veggies in a toasted roll. Enjoy! Let me know if you try it out!

  • French bread recipe

    This recipe for homemade white sandwich bread sounds amazing! It’s a great combination of convenience and quality, especially since it provides two methods: one with a stand mixer and one without. Whether you’re kneading by hand or using the mixer, you’re still left with the soft, flexible loaf you’re craving. Let’s break it down into steps so it’s easier to follow:

    Ingredients:

    • Warm milk (helps make the bread soft and tender)
    • Salt (for flavor)
    • Sugar (to help retain moisture and extend freshness)
    • Olive oil (for flexibility and to slow down staling)
    • Active dry yeast (for rise)
    • Strong bread flour (high protein for a soft, springy texture)

    Two Methods for Making Sandwich Bread


    Method 1: Stand Mixer (Kneading)

    1. Warm the Milk: Microwave the milk until it’s warm but not hot.
    2. Mix Ingredients: In the bowl of your stand mixer, add the warm milk, salt, sugar, olive oil, and yeast. Stir to combine.
    3. Add Flour: Gradually add the bread flour.
    4. Mix and Knead: Start mixing at medium speed until the dough starts to come together, then increase to high speed and knead for about 3 minutes until the dough pulls away from the sides and is tacky.
    5. Shape and Rest: Grease a bowl, form the dough into a ball, cover, and let it rest for 2 hours.

    Method 2: No-Knead Version (Hand Mixing)

    • Mix Wet Ingredients: In a large bowl, combine warm milk, salt, sugar, olive oil, and yeast. Stir to dissolve.
    • Add Flour: Gradually add the bread flour, mixing with a fork until it forms a rough dough.
    • Hydrate the Dough: Use wet hands to mix and hydrate any dry spots of flour. This process helps develop the gluten network without the need for kneading.
    • Stretch & Fold: Let the dough rest for 30 minutes, then perform stretches and folds 4 times, with 30 minutes of resting in between.
    • Let it Rise: After the final fold, let the dough rise for 1-2 hours until it triples in size.

    Shaping and Proofing

    • Prepare the Pan: Generously butter your loaf pan.
    • Shape the Dough: Transfer your dough onto a floured surface. Roll it into a rectangle and then roll it up tightly into a sausage shape, pinching the seams as you go.
    • Second Rise: Place the dough into the loaf pan, seam side down, and cover loosely. Let it rise for 1 hour until it’s risen above the top of the pan.

    Baking

    • Preheat the Oven: Heat the oven to 350°F (180°C).
    • Bake: Place the loaf in the oven and bake for about 25 minutes. Be careful not to overbake!
    • Butter the Top: Once out of the oven, optionally butter the top of the loaf while it’s still hot for extra flavor.
    • Cool: Let the bread cool on a wire rack for at least an hour before cutting into it.

    Storing

    • Room Temperature: Store in a zip-top bag at room temperature for up to a week.
    • Freezing: You can freeze slices for up to 1-2 months. Simply toast from frozen when needed!

    This bread sounds like it would make the perfect base for sandwiches, toasted with butter, or eaten fresh. Let me know if you’d like help with any specific part of the recipe!

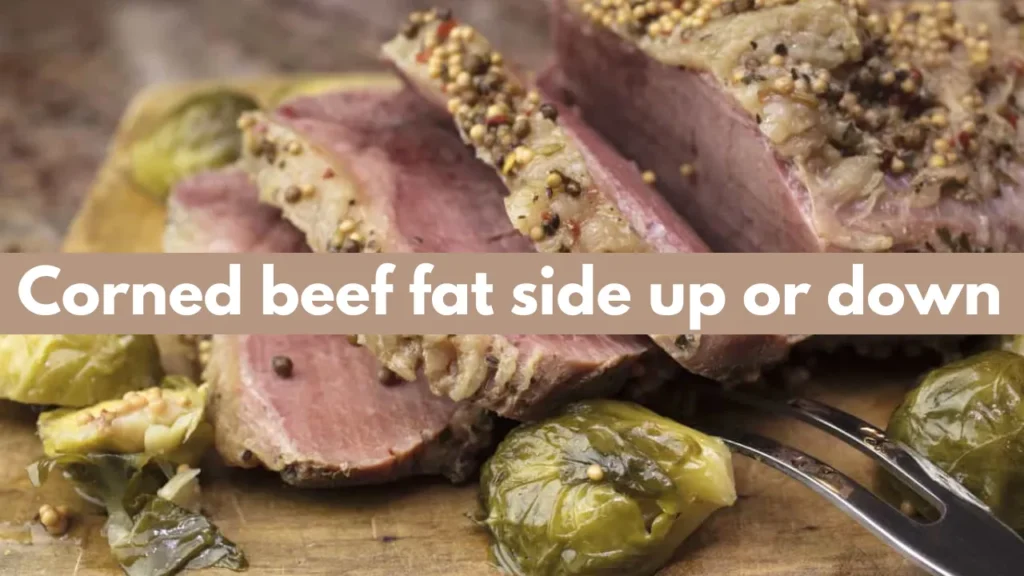
  • Corned beef fat side up or down

    We’re not talking about how corned beef is made, but about how to cook it. Does it make a difference how you place the meat while cooking? If it does, why? We’re here to explain the answers.

    Corned Beef Fat Side Up or Down?

    When cooking corned beef, do you put the fat side up or down? You may not have thought about it until now, but it’s something worth considering.

    When cooking corned beef on the stove or in a slow cooker, put the fat side up. This helps prevent the fat from burning while letting it melt and add flavor to the meat. If you’re grilling or smoking the beef, place it with the fat side down, so it’s closer to the heat.

    Best Cuts for Corned Beef 
    Corned beef isn’t a specific cut of meat. It’s actually a method of preparing beef by soaking it in a brine solution before cooking.

    When corned beef became popular, the rock salt used for curing had large crystals. The word “corn” comes from a German word meaning “small seed,” so these salt crystals were called “corns.”

    Most corned beef in stores and delis is made from beef brisket. The flat part of the brisket is often chosen because it cooks evenly and is easy to slice.

    You can also buy a whole brisket and cook the point and flat parts together or separately. The point is juicy and tasty, but it’s better for shredding because of its uneven grain.

    The point is less often sold on its own, but if you like your corned beef chopped or shredded, you can use just the point part.

    If you can’t find brisket, you can use a different cut, like a chuck roast. It has enough fat and tissue to handle the long cooking time.

    Corned Beef Fat Side Up or Down?

    There’s no one right answer to whether the fat side of corned beef should be up or down. Both ways work, and the meat will turn out well either way.

    However, here’s a simple guideline: If you’re cooking the beef in liquid, put the fat side up. If you’re cooking it over direct heat, place the fat side down.

    Corned Beef Fat Side Up or Down?

    There’s no clear-cut answer for whether the fat side should be up or down when cooking corned beef. Both methods can work well, and the meat will taste good either way.

    However, there’s a simple rule you can follow: if you’re cooking corned beef in liquid, place the fat side up. But, if you’re cooking it over direct heat (like grilling or smoking), place the fat side down.

    How to Cook Corned Beef Fat Side Down

    Why Fat Side Up?

    When cooking large cuts of meat, it’s usually best to position the fat side towards the heat source. If the fat is on top, it will have more time to melt and flavor the meat. If the fat is at the bottom, it may take longer to render (melt), and some fat could remain in the meat when it’s done. Also, any melted fat running down can wash away the seasonings, which could reduce flavor.

    When simmering corned beef in liquid, the meat is completely submerged, so you don’t have to worry about losing flavor. Additionally, if the fat is on the bottom, it might burn, leading to a bitter taste, which can be avoided by keeping the fat side up.

    Should You Trim the Fat?

    Brisket is a great choice for corned beef because of its fat, which helps keep the meat moist during the long cooking time. You don’t need to trim all the fat off. If the fat cap is very thick, though, you might want to trim a bit, especially if you’re grilling or smoking, to avoid flare-ups.

    It’s a good idea to leave about 1/4 to 1/2 inch of fat on the meat. The fat inside the meat (intramuscular fat) should stay, as it helps keep the meat juicy and tender.

    Once the corned beef is cooked, you can remove any excess fat if it’s too much. You can skim off the fat from the cooking liquid or peel it off if you’re using dry heat.


    How to Cook Corned Beef Fat Side Up

    1. Prepare the pot: Use a heavy pot or Dutch oven large enough to hold the corned beef and enough liquid to cover it.
    2. Add oil: Coat the bottom of the pot with a thin layer of oil to prevent sticking.
    3. Cook the beef: Turn the heat to medium-high and add the corned beef with your seasonings. You can add onions for flavor, but save other vegetables for later.
    4. Add liquid: Add enough liquid (beer, water, or beef stock) to fully cover the meat.
    5. Bring to boil: Bring the liquid to a boil, then lower the heat and let it simmer. Cook for 1 hour per pound.
    6. Add vegetables: In the last hour of cooking, add vegetables.
    7. Check temperature: When the beef reaches 180°F, it’s done and should be tender but still firm enough to slice.
    8. Rest: Let it rest for 10 minutes before serving.

    1. Preheat the smoker: Heat the smoker to 275°F. You can use bold wood like oak or hickory, or milder wood like apple or pecan.
    2. Place the beef in the smoker: Put the corned beef in with the fat side facing the heat.
    3. Cook the meat: Let it cook for 1 hour per pound. While waiting, prepare a disposable foil pan with nonstick spray.
    4. Add liquid: When the beef reaches 160°F, remove it and place it in the foil pan with the fat side down. Add enough beer, water, or stock to cover about one-third of the meat.
    5. Cook in foil: Tent the pan with foil and place it back on the smoker. Let it cook until the internal temperature reaches 180°F, which may take 1 to 2 more hours.
    6. Rest: Let the corned beef rest for 10 minutes before serving.

    Pro Tip: To slice neatly, cut across the grain. For a pulled texture, slice along the grain.


    Final Thoughts

    Your corned beef should turn out delicious whether the fat side is up or down. Following these tips should make the cooking process easier. Happy cooking!

  • Banana peanut butter overnight oats

    Easy Banana Peanut Butter Overnight Oats

    If you’re looking for a delicious and healthy breakfast, try these Banana Peanut Butter Overnight Oats! They’re super easy to make, and you’ll have a yummy, ready-to-eat meal when you wake up. Here’s how to make them:

    Ingredients:

    • Unsweetened almond milk (or any milk you like)
    • Peanut butter (melted a little to mix easily)
    • Chia seeds
    • Honey
    • Old-fashioned oats
    • A banana (for topping)

    Instructions:

    1. Prepare the base:
    • Start by adding your milk (I’m using unsweetened almond milk) to a bowl. You can use any type of milk you like.
    • Next, add peanut butter. I microwaved mine for a few seconds so it mixes easily.
    • Add chia seeds to the mixture, then pour in some honey for sweetness.
    • Mix everything together really well.

    2. Add the oats:

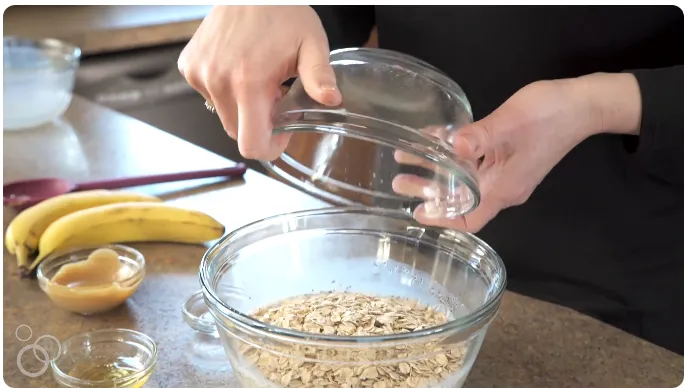
    • After mixing, add the old-fashioned oats to the bowl. Stir everything again to make sure the oats are evenly mixed with the liquid.

    3. Set it up for the night:

    • You can leave this mixture in one big bowl, but I prefer to divide it into individual containers like mason jars. This makes it easier to grab and go in the morning.
    • Use a measuring cup to spoon the mixture into three separate jars. Make sure the milk is evenly spread so the oats can soak up all the liquid overnight.
    • Put the lids on and store them in the fridge overnight.

    4. In the morning:

    • When you’re ready to eat, take the jars out of the fridge and add some fresh banana slices on top for extra flavor.
    • Drizzle a little more honey for sweetness.
    • Add a bit more peanut butter (microwaved for 30 seconds so it’s easy to drizzle) on top.
    • If you like, sprinkle a few more chia seeds on top for extra texture.
    banana peanut butter overnight oats

    Enjoy your breakfast! These overnight oats are quick to prepare and will be waiting for you in the morning, ready to eat!

    For the full recipe, check out Julie’s Eats and Treats!

  • Hello world!

    Welcome to WordPress. This is your first post. Edit or delete it, then start writing!